Add a simple frontend
This will be the final section in this chapter, where we'll add a simple frontend using React and near-api-js to communicate with the smart contract.

Art by dakila.near
There will be three main files we'll be working with:
src/index.jswill be the entry point, where NEAR network configuration will be set up, and the view-only call toget_solutionwill happen.src/App.jsis then called and sets up the crossword table and checks to see if a solution has been found.src/utils.jsis used to make a view-only call to the blockchain to get the solution, and other helper functions.
Entry point
We'll go over a pattern that may look familiar to folks who have surveyed the NEAR examples site. We'll start with an asynchronous JavaScript function that sets up desired logic, then pass that to the React app.
Loading...
Let's talk through the code above, starting with the imports.
We import from:
config.jswhich, at the moment, is a common pattern. This file contains details on the different networks. (Which RPC endpoint to hit, which NEAR Wallet site to redirect to, which NEAR Explorer as well…)utils.jsfor that view-only function call that will callget_solutionto retrieve the correct solution hash when a person has completed the crossword puzzle correctly.hardcoded-data.jsis a file containing info on the crossword puzzle clues. This chapter has covered the crossword puzzle where the solution is near nomicon ref finance, and according to the chapter overview we've committed to serving one puzzle. We'll improve our smart contract later, allowing for multiple crossword puzzles, but for now it's hardcoded here.
Next, we define an asynchronous function called initCrossword that will be called before passing data to the React app. It's often useful to set up a connection with the blockchain here, but in our case all we need to do is retrieve the crossword puzzle solution as a hash. Note that we're attempting to pass this environment variable NEAR_ENV into our configuration file. NEAR_ENV is used to designate the blockchain network (testnet, betanet, mainnet) and is also used in NEAR CLI.
Lastly, we'll call initCrossword and, when everything is complete, pass data to the React app contained in App.js.
React app
Here's a large portion of the App.js file, which will make use of a fork of a React crossword library by Jared Reisinger.
Loading...
We'll discuss a few key points in the code above, but seeing as we're here to focus on a frontend connection to the blockchain, will brush over other parts that are library-specific.
The two imports worth highlighting are:
parseSolutionSeedPhrasefrom the utility file we'll cover shortly. This will take the solution entered by the user and put it in the correct order according to the rules discussed in the chapter overview.sha256will take the ordered solution from above and hash it. Then we'll compare that hash with the one retrieved from the smart contract.
const [solutionFound, setSolutionFound] = useState(false);
We're using React Hooks here, setting up the variable solutionFound that will be changed when the player of the crossword puzzle enters the final letter of the crossword puzzle, having entries for all the letters on the board.
The onCrosswordComplete and checkSolution blocks of code fire events to check the final solution entered by the user, hash it, and compare it to the solutionHash that was passed in from the view-only call in index.js earlier.
Finally, we return the JSX for our app and render the crossword puzzle! In this basic case we'll change this heading to indicate when the user has completed the puzzle successfully:
<h3>Status: { solutionFound }</h3>
Utility functions
We'll be using two utility functions here:
parseSolutionSeedPhrasewhich will take a completed crossword puzzle and place the answers in the proper order. (Ascending by number, across answers come before down ones.)viewMethodOnContractmakes the view-only call to the smart contract to retrieve the solution hash.
We'll only focus on the second method:
Loading...
This API doesn't look warm and friendly yet. You caught us! We'd love some help to improve our API as detailed in this issue, but for now, this is a concise way to get data from a view-only method.
We haven't had the frontend call a mutable method for our project yet. We'll get into that in the coming chapters when we'll want to have a prize sent to the first person to solve the puzzle.
Run the React app
Let's run our frontend on testnet! We won't add any new concepts at this point in the chapter, but note that the near examples typically create an account for you automatically with a NodeJS command. We covered the important pattern of creating a subaccount and deploying the smart contract to it, so let's stick with that pattern as we start up our frontend.
Go into the directory containing the Rust smart contract and build it:
cd contract

# Build
cargo near build
Create fresh account if you wish, which is good practice:
- Short
- Full
# Delete an account
near delete-account crossword.friend.testnet friend.testnet --networkId testnet

# Create an account again
near create-account crossword.friend.testnet --use-account friend.testnet --initial-balance 1 --network-id testnet
# Delete an account
near account delete-account crossword.friend.testnet beneficiary friend.testnet network-config testnet sign-with-keychain send

# Create an account again
near account create-account fund-myself crossword.friend.testnet '1 NEAR' autogenerate-new-keypair save-to-keychain sign-as friend.testnet network-config testnet sign-with-keychain send
Deploy the contract:
cargo near deploy crossword.friend.testnet with-init-call new json-args '{"solution": "69c2feb084439956193f4c21936025f14a5a5a78979d67ae34762e18a7206a0f"}' prepaid-gas '100.0 Tgas' attached-deposit '0 NEAR' network-config testnet sign-with-keychain send
Return to the project root and start the React app:
cd ..
env CONTRACT_NAME=crossword.friend.testnet npm run start
The last line sends the environment variable CONTRACT_NAME into the NodeJS script. This is picked up in the config.js file that's used to set up the contract account and network configuration:
Loading...
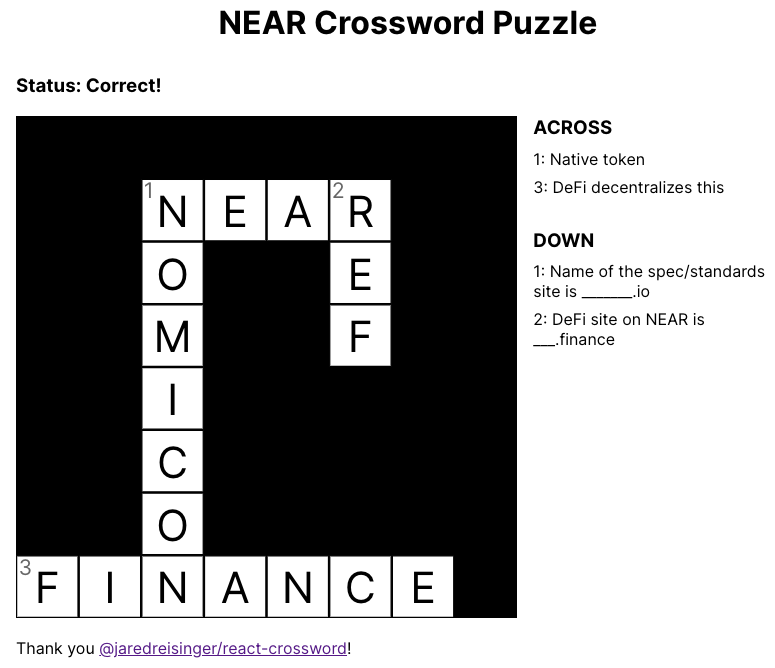
After running the last command to start the React app, you'll be given a link to a local website, like https://localhost:1234. When you visit the site you'll see the simple frontend that interacts with our smart contract:

Again, the full code for this chapter is available here.

